IoT Lab KVS WebRTC WorkShop
IoT Lab KVS WebRTC WorkShop
View the Project on GitHub iotlabtpe/Amazon-KVS-WebRTC-WorkShop
Connect Amazon KVS WebRTC with AWS IoT
We just test Amazon KVS WebRTC with IAM user but it is not recommended. With AWS IoT Thing credentials, it can be managed more securely. To use AWS IoT credential, you need to create an Amazon IAM role to grant your policy.
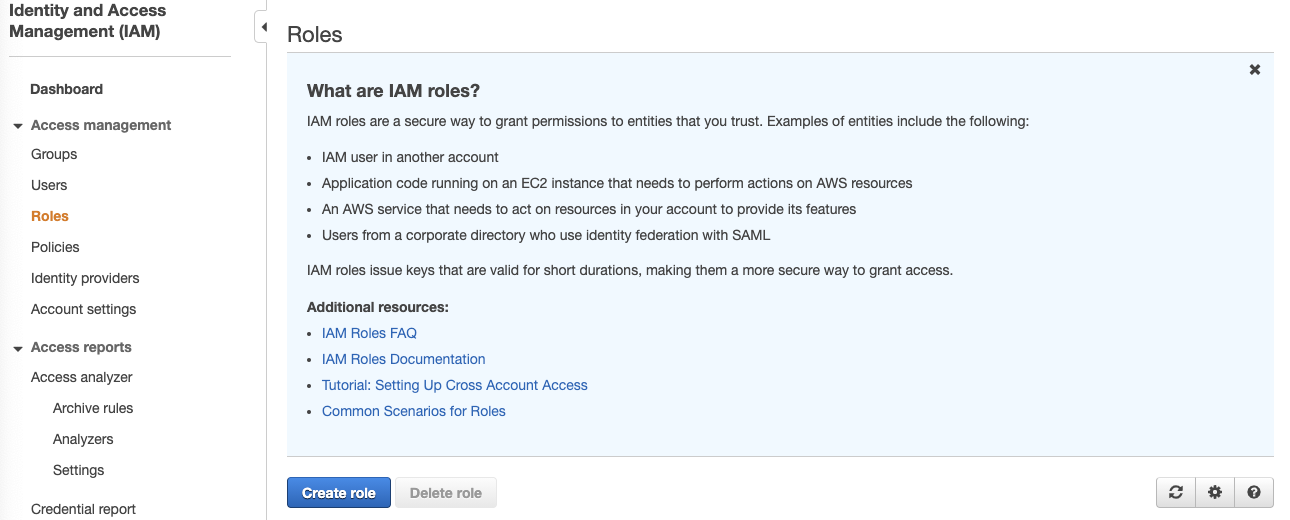
Create an IAM role
- Login to AWS IAM console, click Roles and then click Create role.
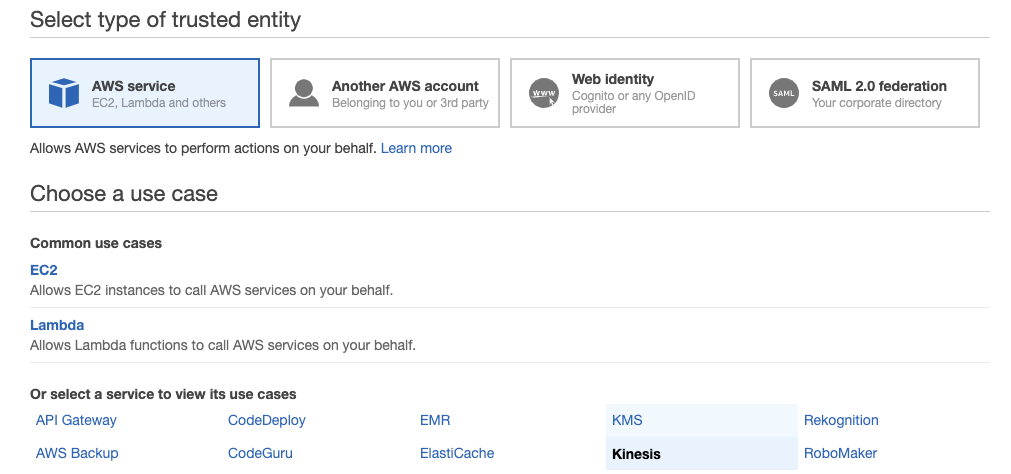
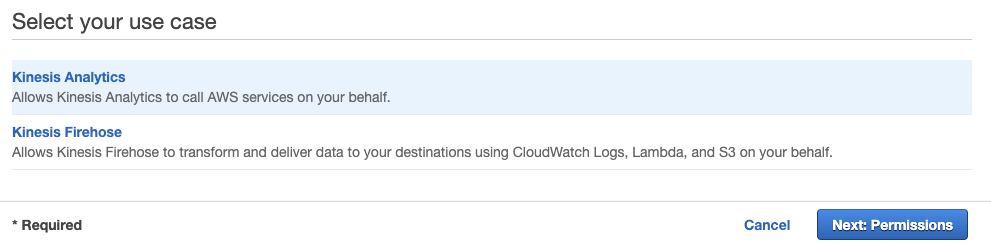
- In Select type of trusted entity, choose AWS service. In Choose a use case, choose Kinesis. In Select your use case, choose Kinesis Analytics then click Next: Permissions. Note that: this is the temporary solution from AWS IAM console to create an empty role. You can use the AWS Command Line Interface (AWS CLI)to do it as well.
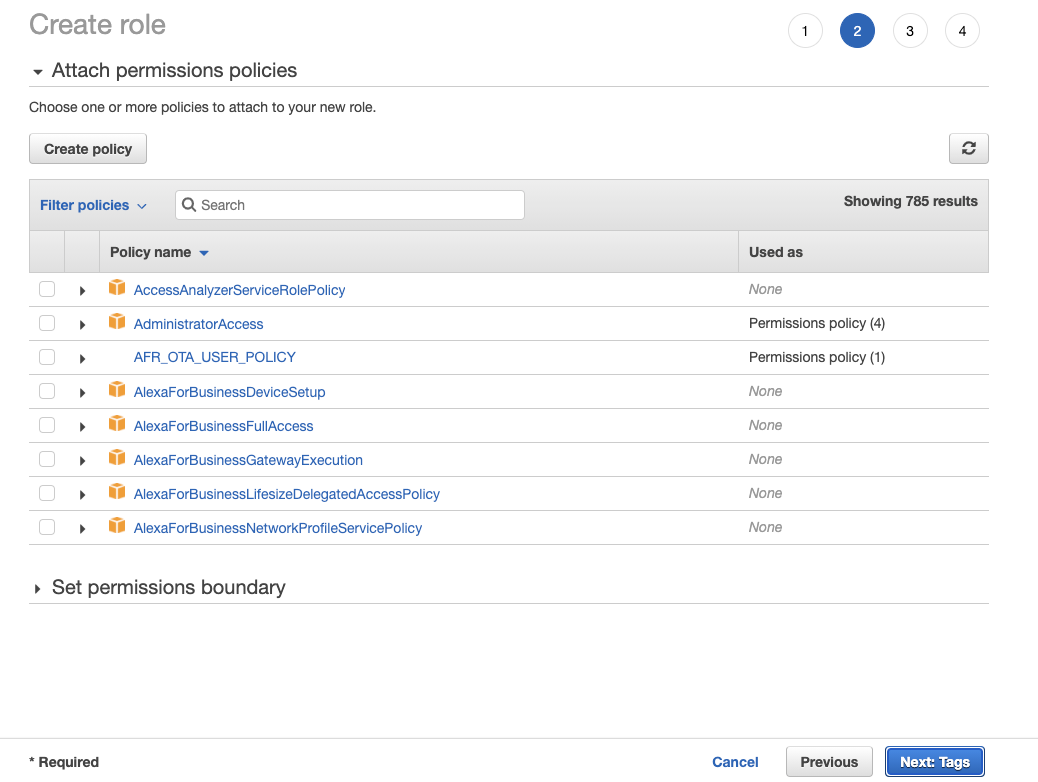
- Leave everything as default and click Next:Tags. Also leave everything as default in Add tags(optional) page then click Next: Review.
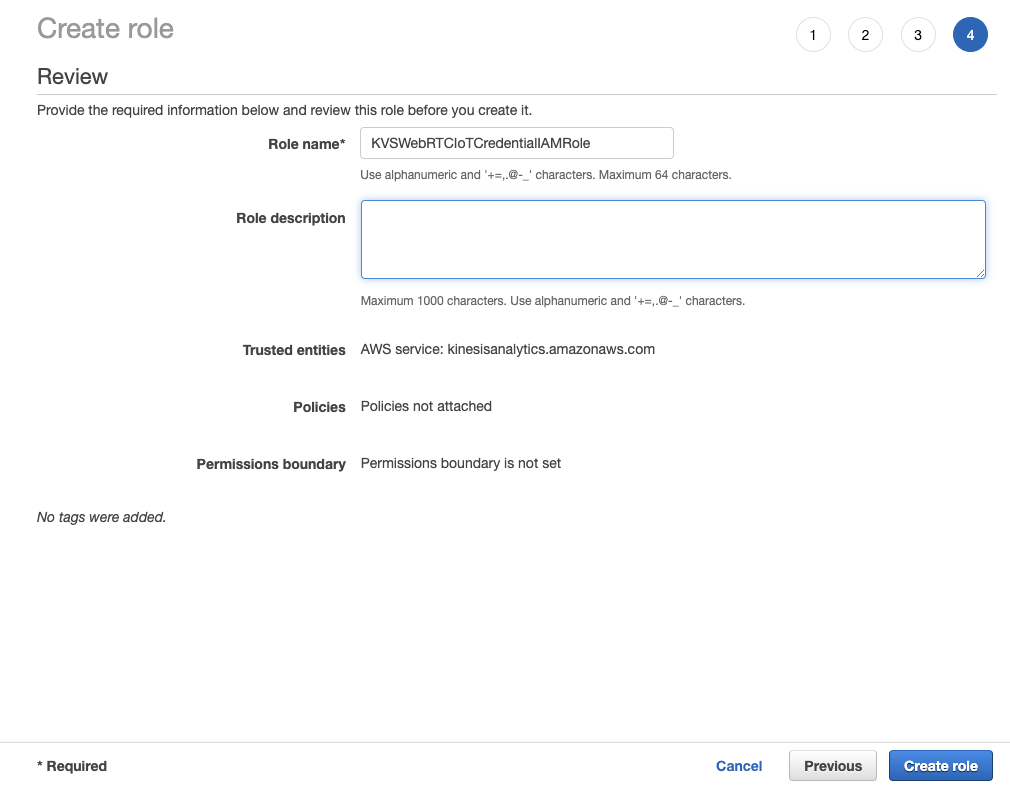
- Give your role a name and delete everything in Role description. Once you finish, click Create role.
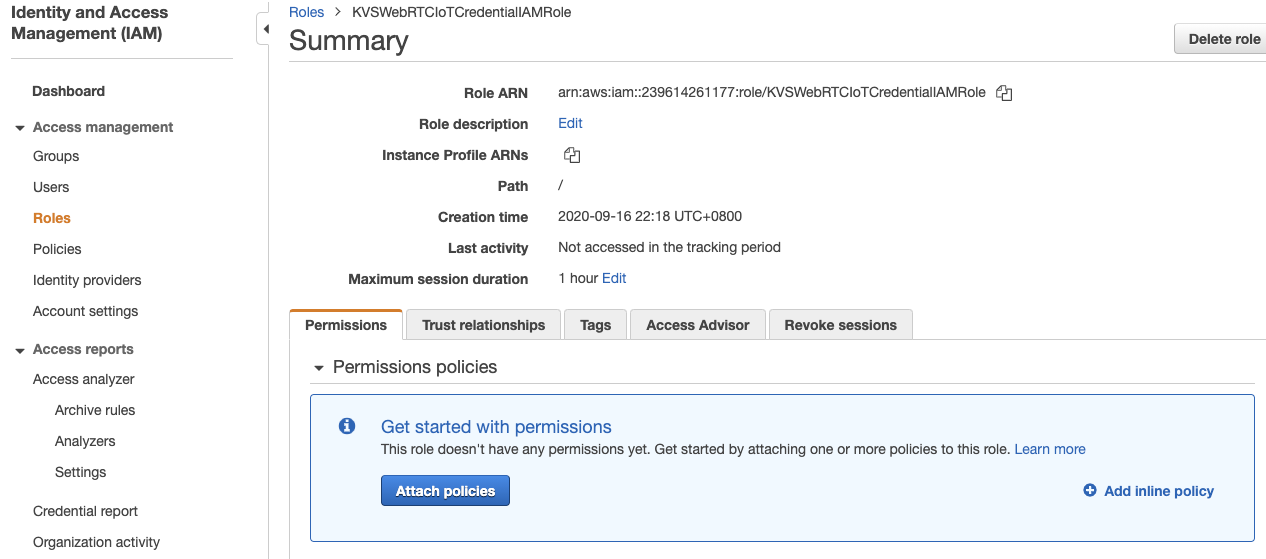
- Search the role you just created above and click it to configure.

- In Permissions tab, click Add inline policy.
- Click JSON tab, copy the following JSON content and paste it. Next you can click Review policy. Note that if you do not want to have an access right to create Amazon KVS WebRTC Signaling Channel, you can remove line
kinesisvideo:DescribeSignalingChannelin the following JSON.{ "Version": "2012-10-17", "Statement": [ { "Effect": "Allow", "Action": [ "kinesisvideo:DescribeSignalingChannel", "kinesisvideo:CreateSignalingChannel", "kinesisvideo:GetSignalingChannelEndpoint", "kinesisvideo:GetIceServerConfig", "kinesisvideo:ConnectAsMaster" ], "Resource": "arn:aws:kinesisvideo:*:*:channel/${credentials-iot:ThingName}/*" } ] }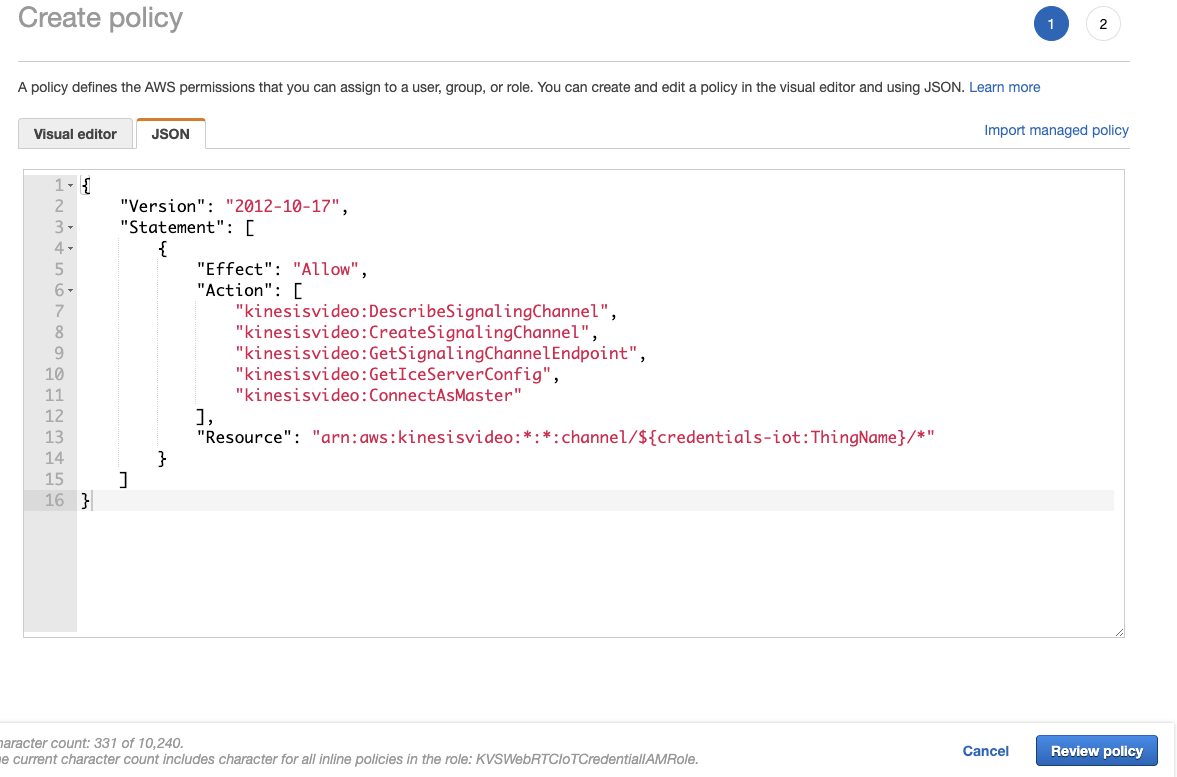
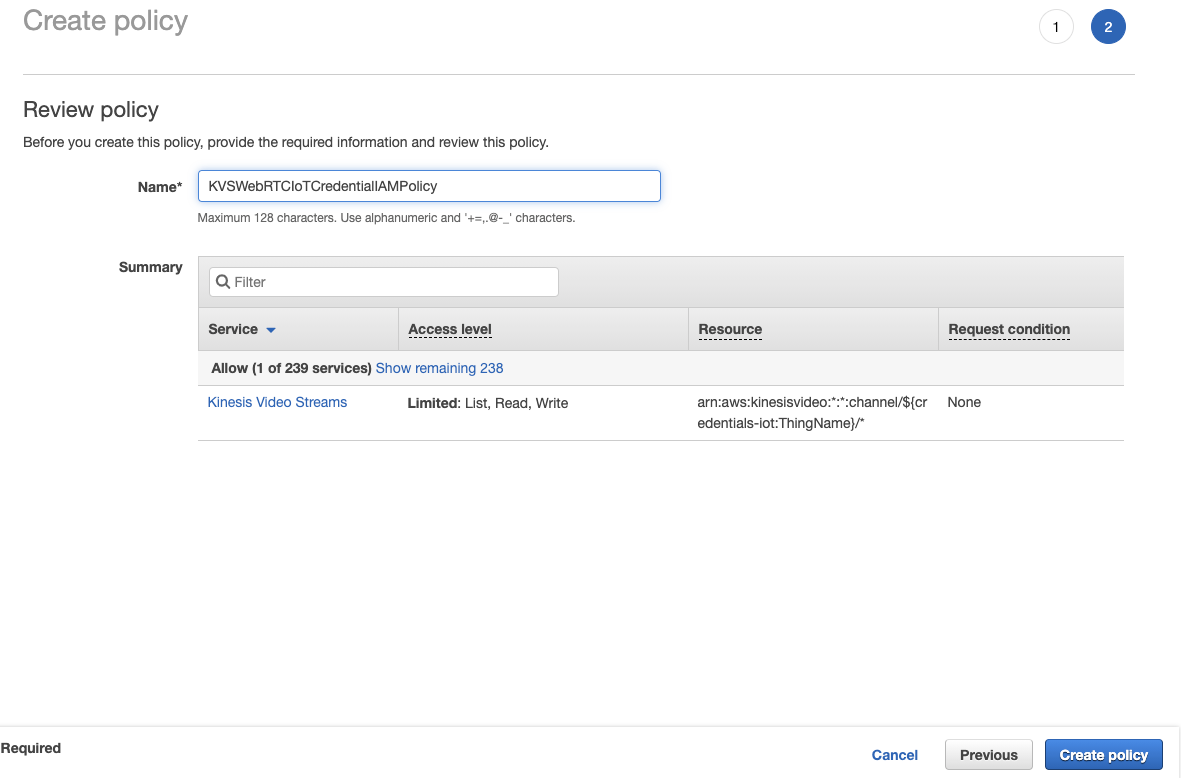
- Give this policy a name and click Create policy.
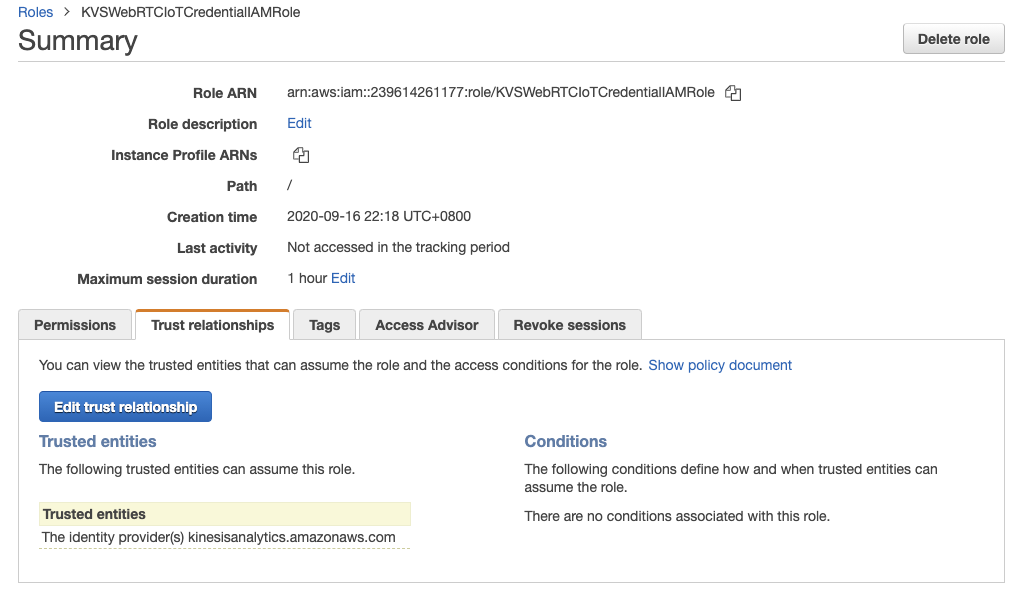
- After the step 8, you will redirect back to the page of role you created above. In Trust relationships, click Edit trust relationship.
- Copy and paste the following JSON content then click Update Trust Policy.
{
    "Version": "2012-10-17",
    "Statement": [
        {
        "Effect": "Allow",
        "Principal": {
            "Service": "credentials.iot.amazonaws.com"
        },
        "Action": "sts:AssumeRole"
        }
    ]
}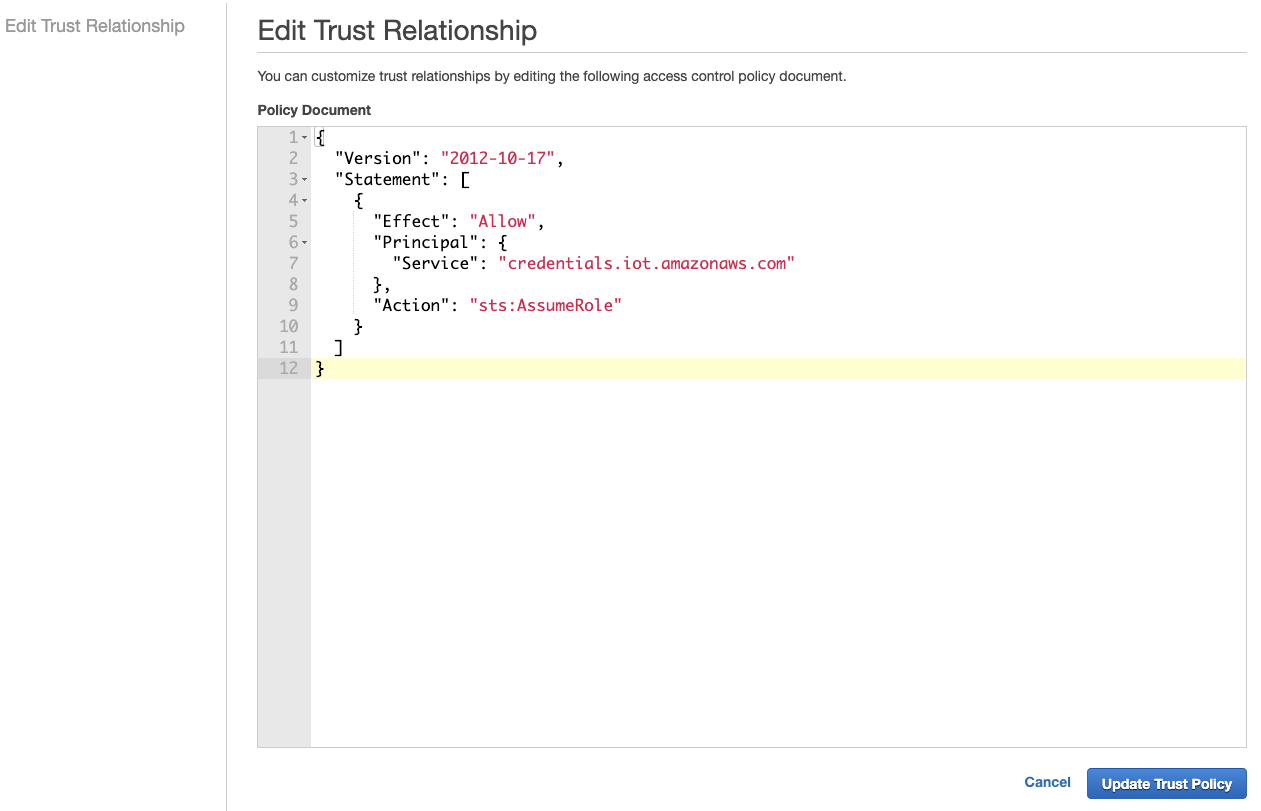
Create an AWS IoT Thing and configure
You can use AWS IoT Thing Name as Signaling Channel Name and AWS IoT Certificate ID as Signaling Channel Name. The example here is to use AWS IoT Thing Name as Signaling Channel Name, including IAM Role you created above.
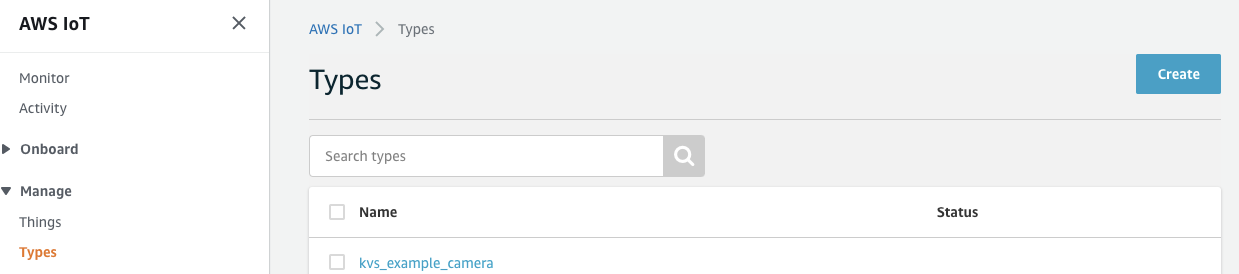
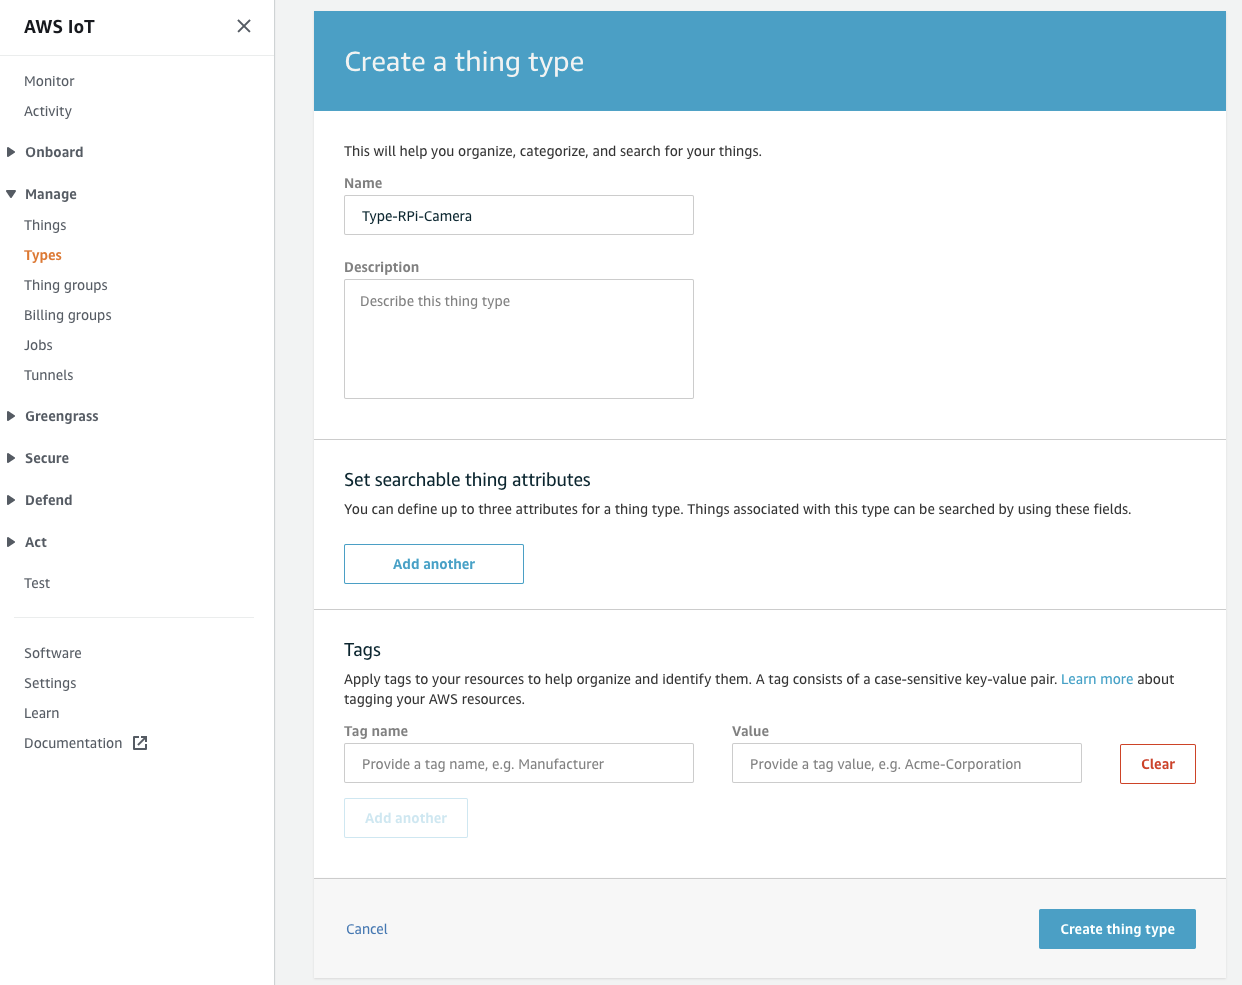
- Login to AWS IoT Core console. You can search it in AWS Management Console: https://aws.amazon.com/. Click Manage and choose Types then click Create. If it is the first time you want to create a thing type, choose Create a thing type.
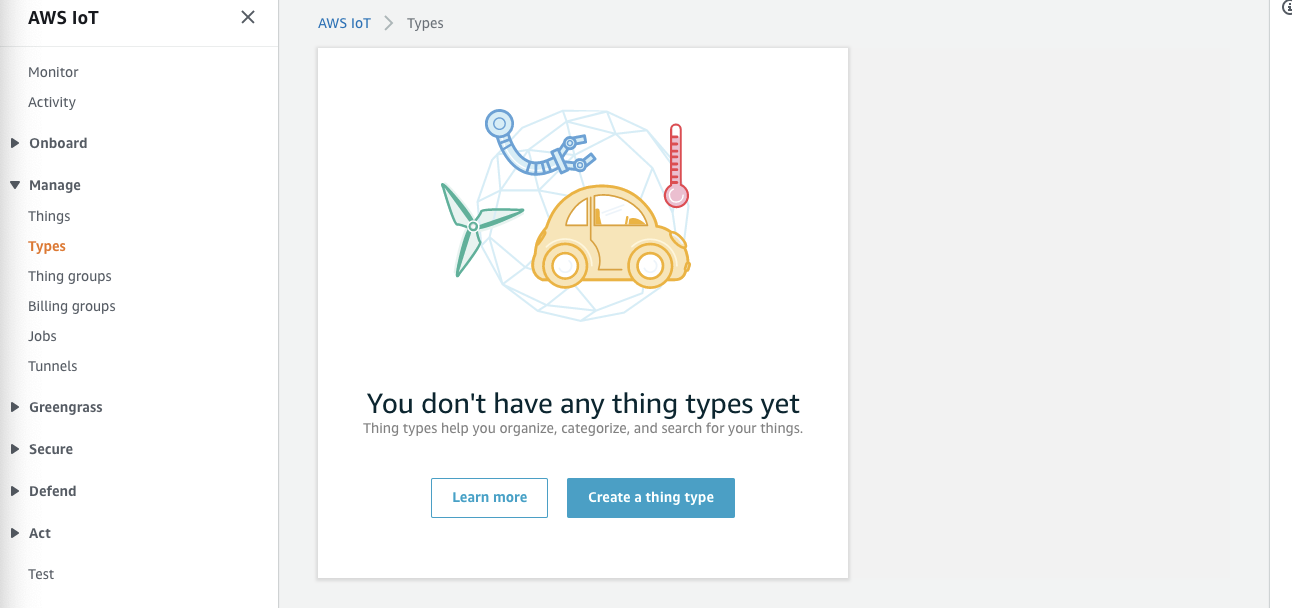
- Give a name and leave everything else as default then click Create thing type.
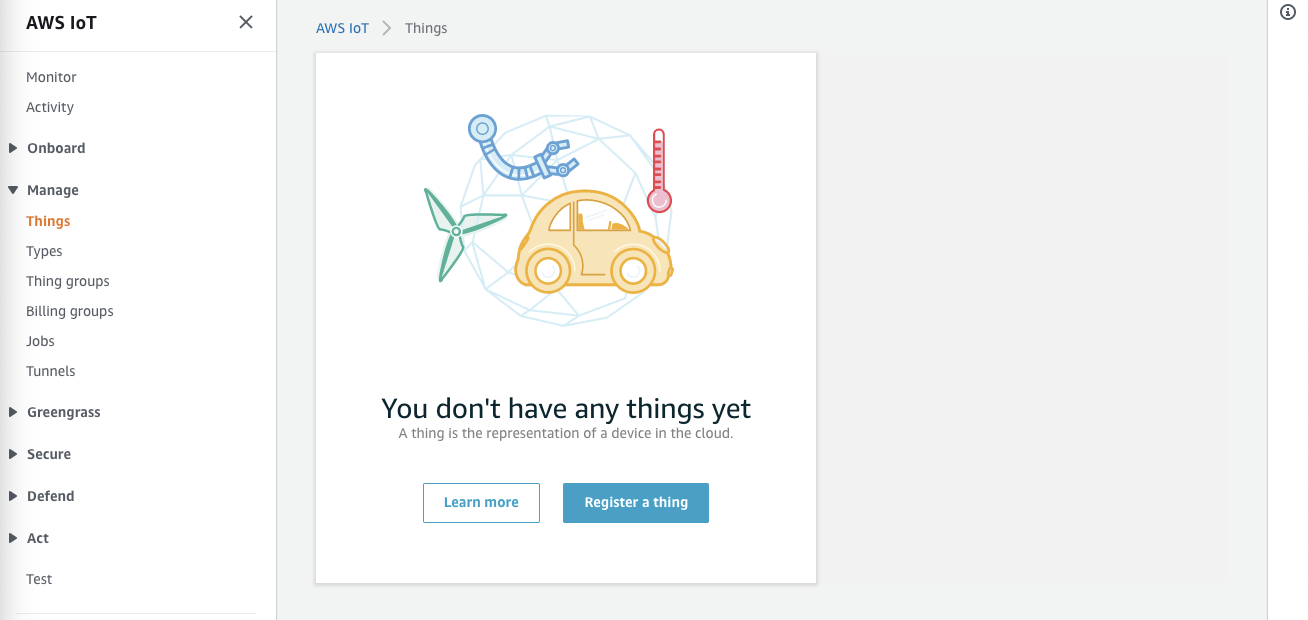
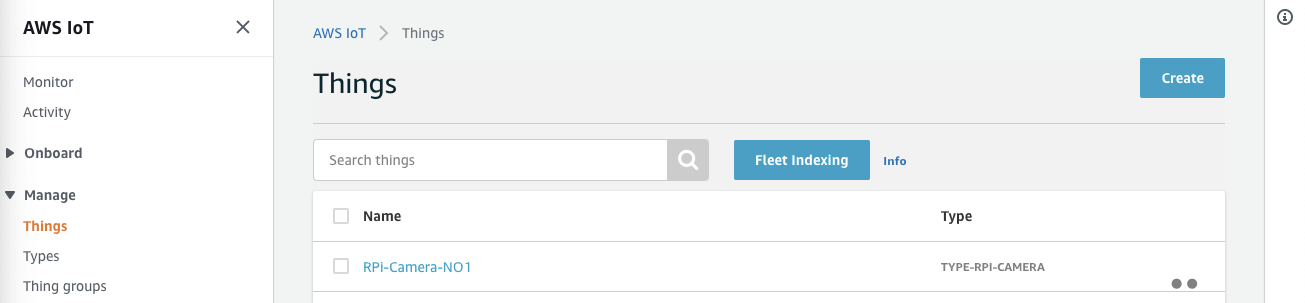
- Click Manage and choose Things then click Create. If it is the first time you want to create a thing, choose Register a thing.

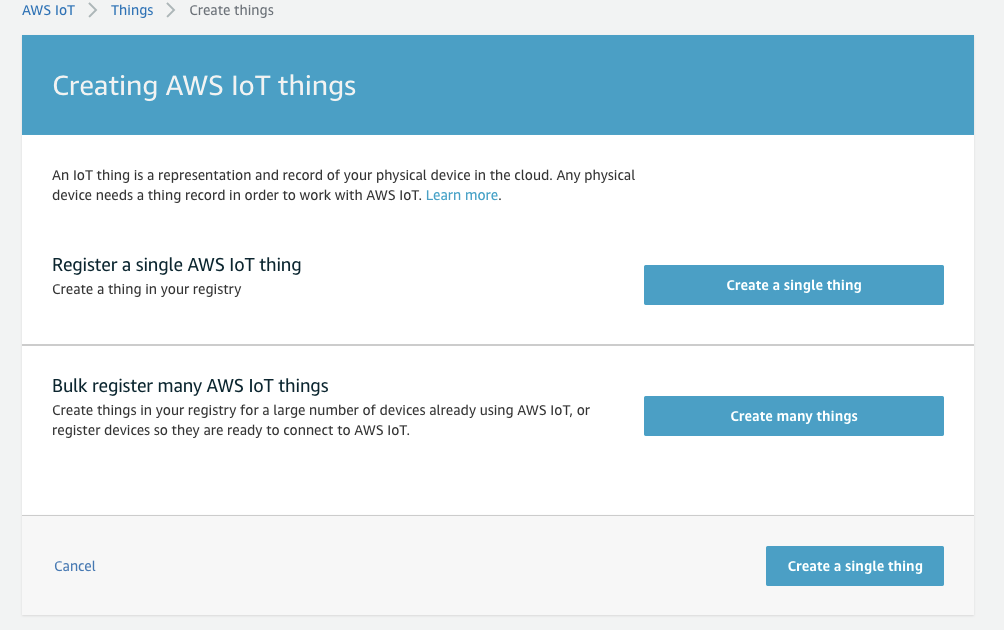
- Choose Create a single thing.
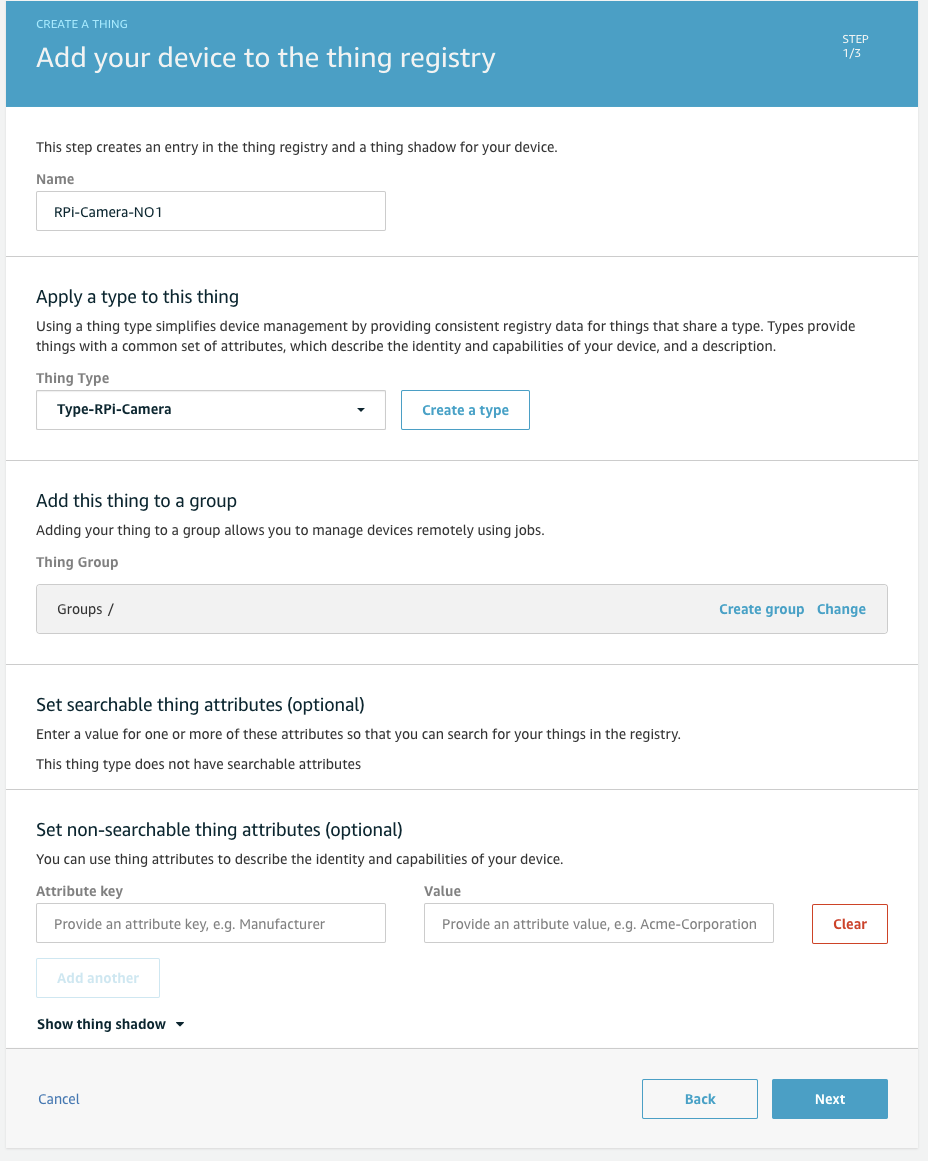
- Give a name and choose the type you created above then click Next.
- Choose One-click certificate (recommended) and click Create certificate.
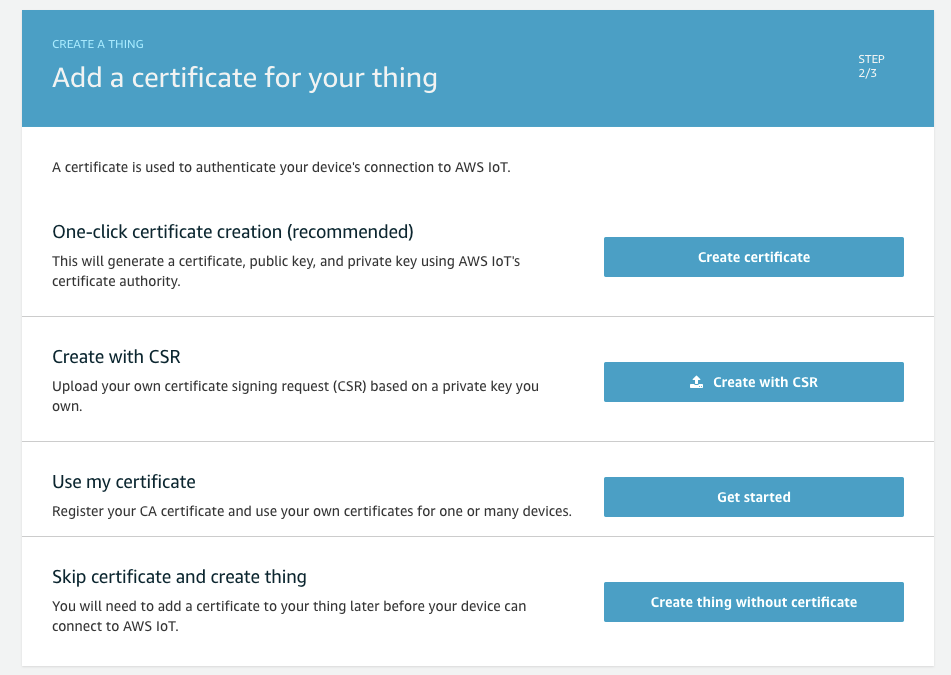
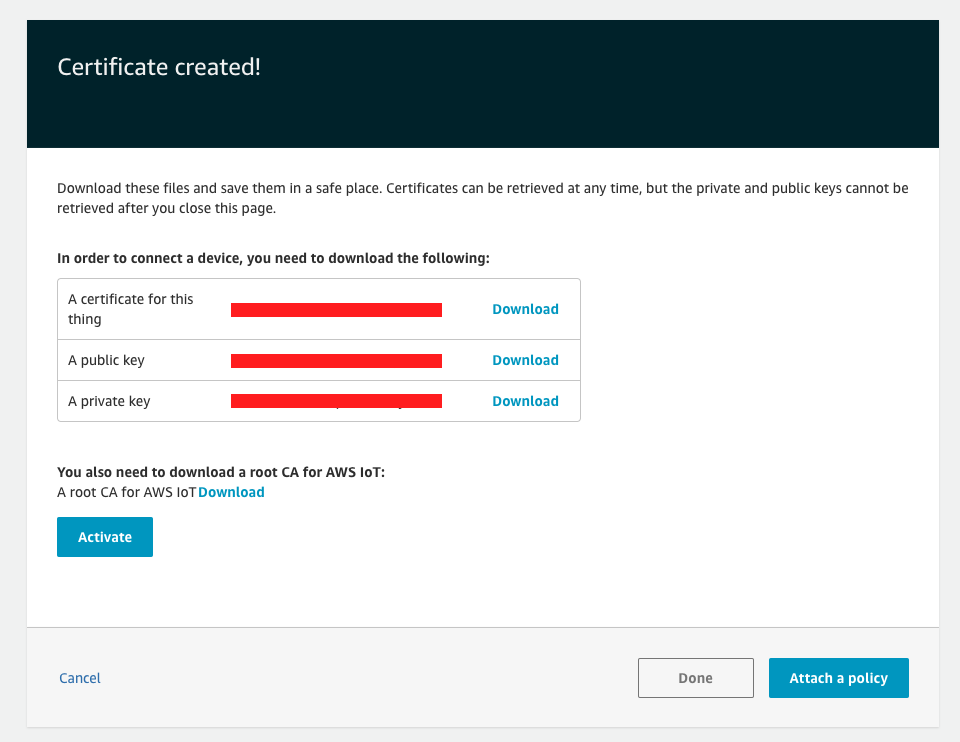
- Download three files including certificate, public key and private key. Click Activate then click Done. We will attach policy later.
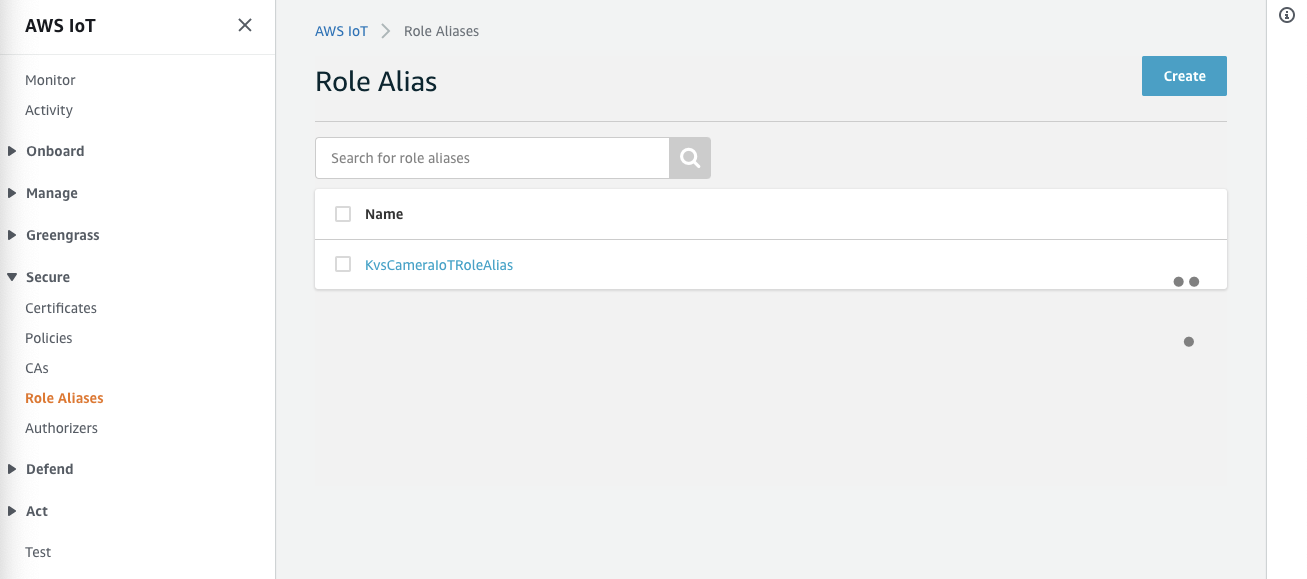
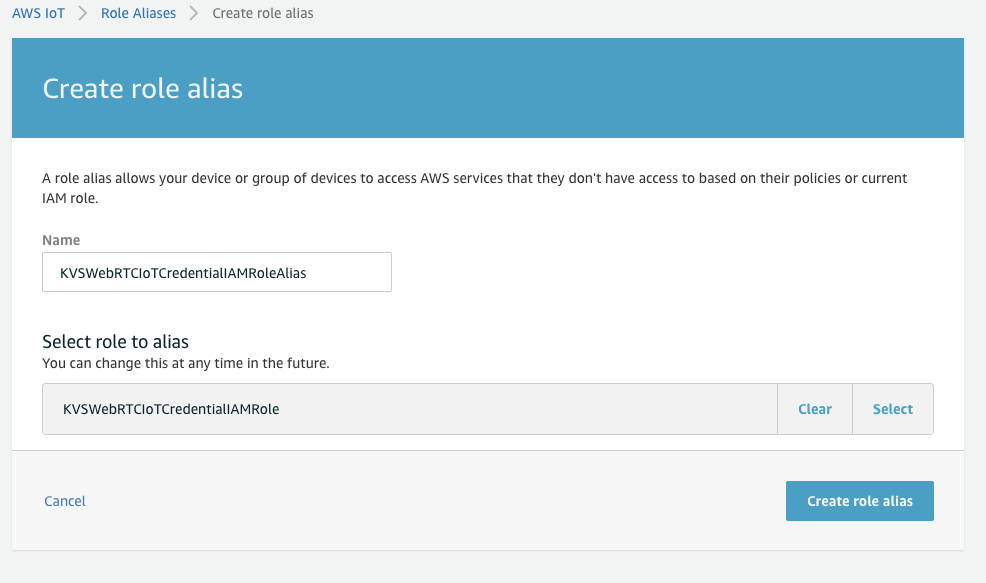
- In Secure, choose Role Aliases and click Create. If it is the first time you want to create a thing, choose Create role alias.
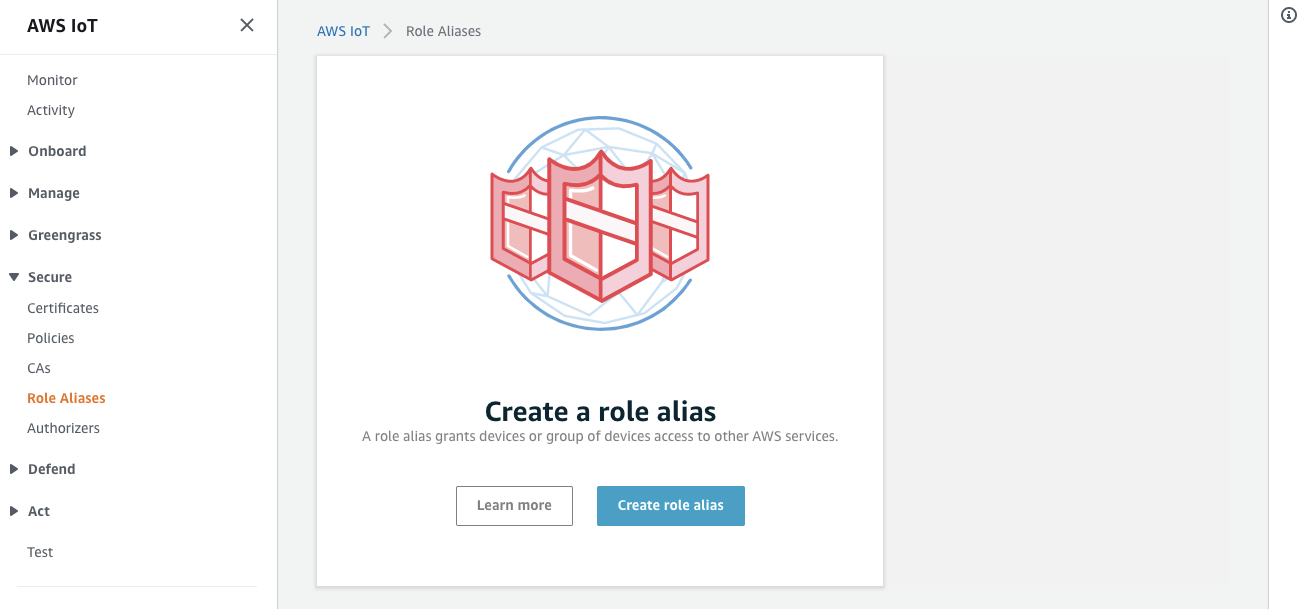
- Give a name and choose the IAM role you created above in Select role to alias then click Create role alias.
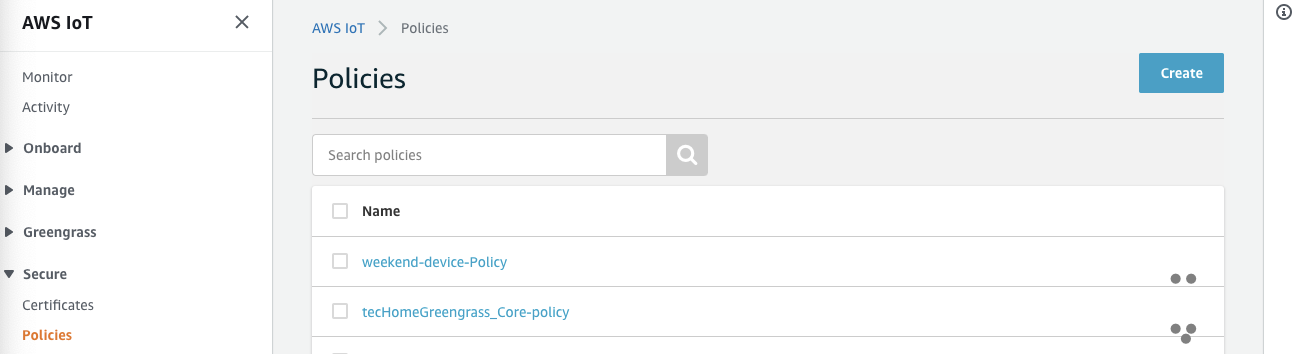
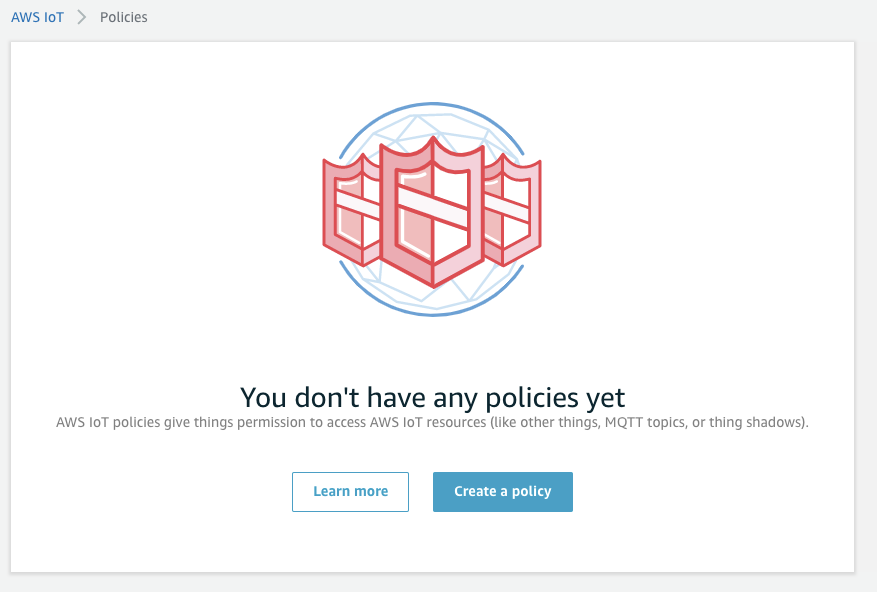
- In Secure, choose Policies then click Create. If it is the first time you want to create a AWS IoT policy, choose Create a policy.
- Give a name and choose Advanced mode.
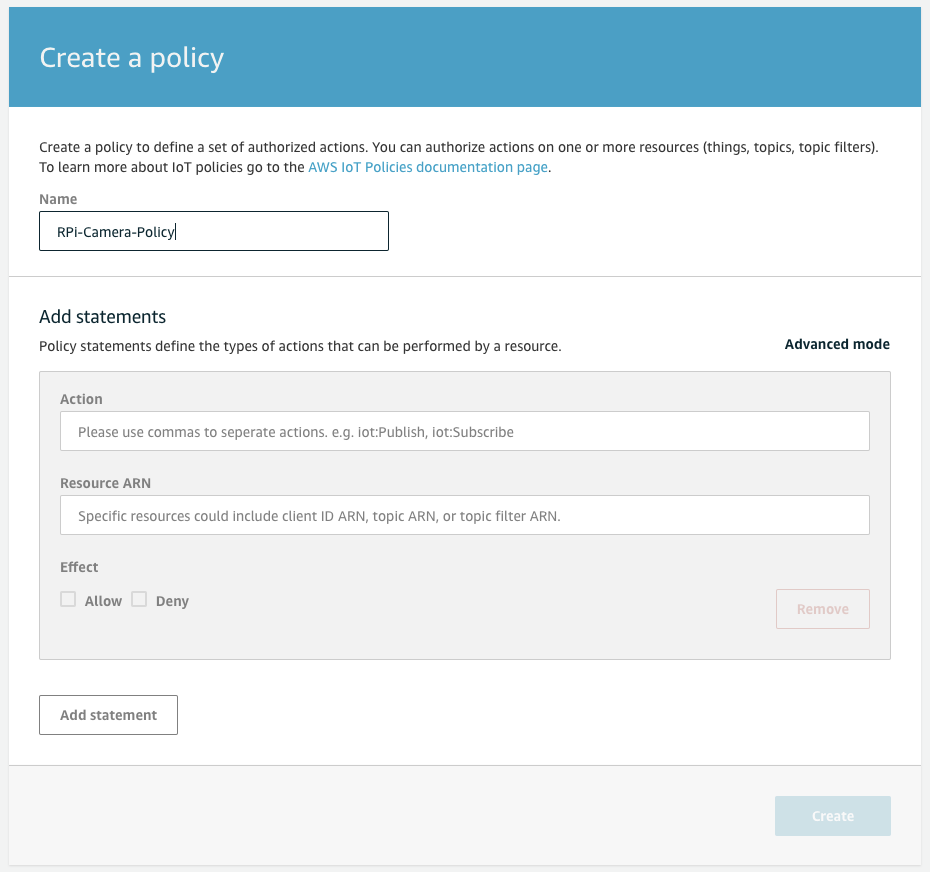
- Copy the following JSON content and paste then click Create. Note that: you need to fill
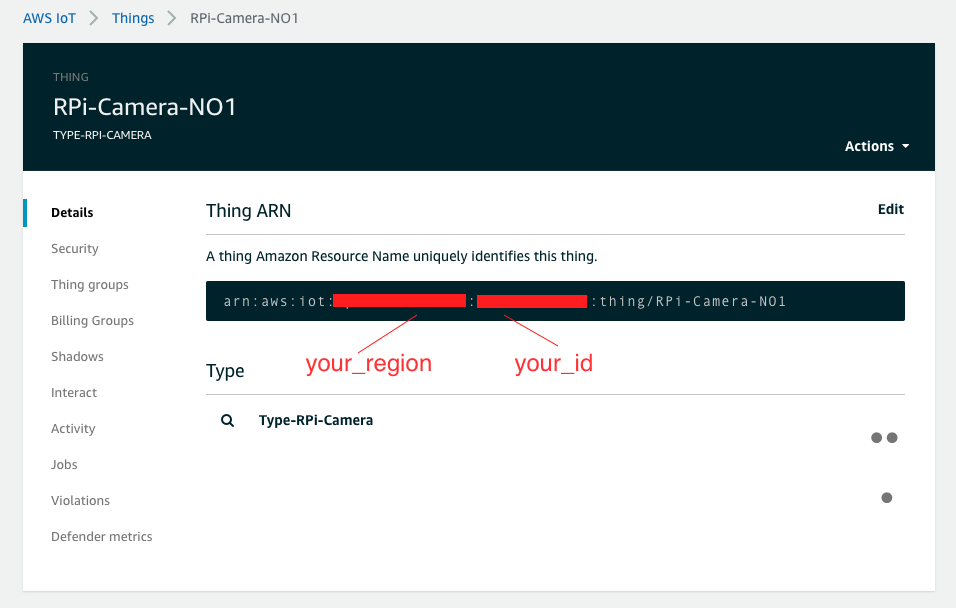
your_region,your_idandyour_policy_aliaswith your own information. You can find your_region and your_id in thing information you created above. Andyour_policy_aliasis the alias you created above.{ "Version": "2012-10-17", "Statement": [ { "Effect": "Allow", "Action": [ "iot:Connect" ], "Resource": "arn:aws:iot:your_region:your_id:rolealias/your_policy_alias" }, { "Effect": "Allow", "Action": [ "iot:AssumeRoleWithCertificate" ], "Resource": "arn:aws:iot:your_region:your_id:rolealias/your_policy_alias" } ] }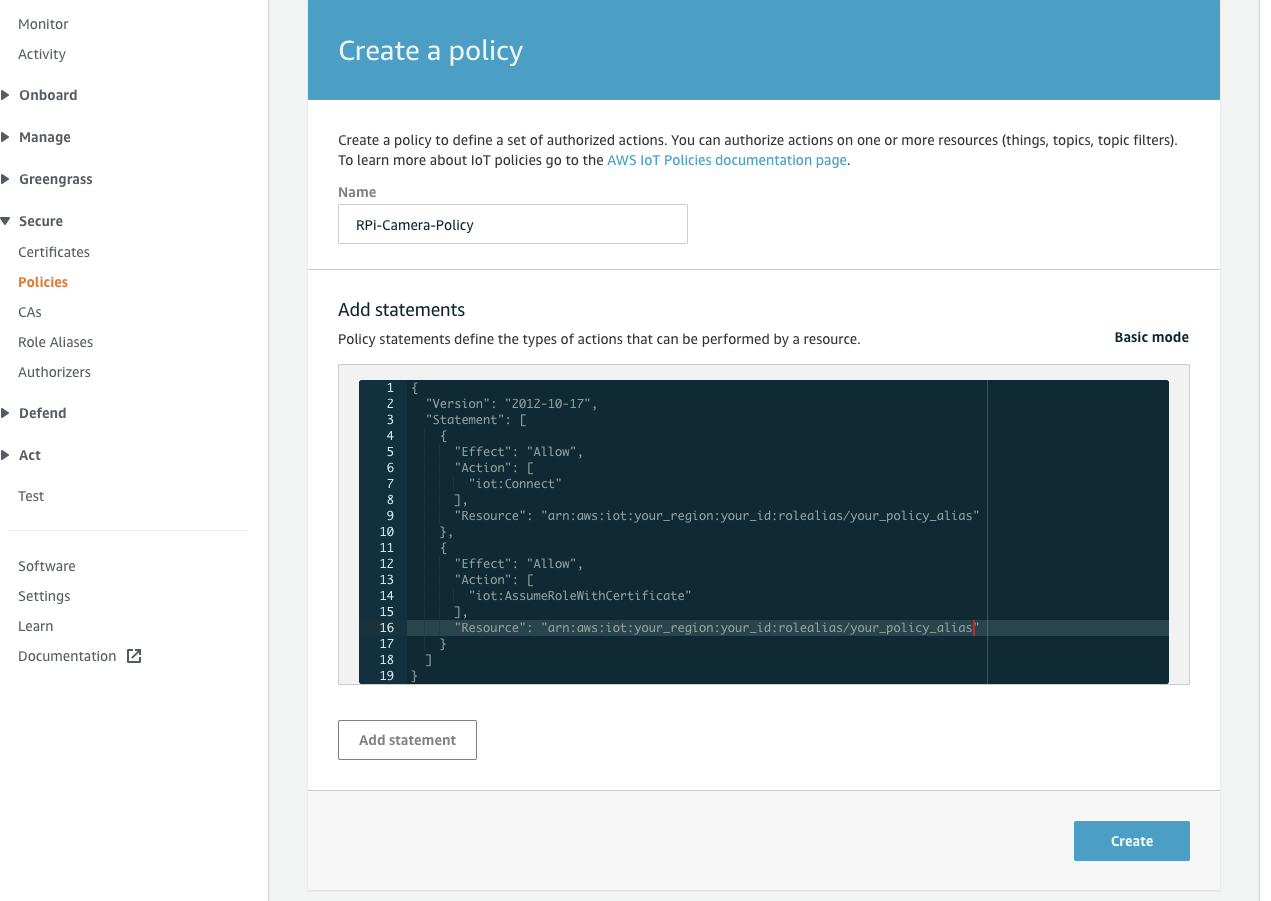
- In Manage, choose Things and click the thing you created above.
- Click Security then click the certificate you created above.
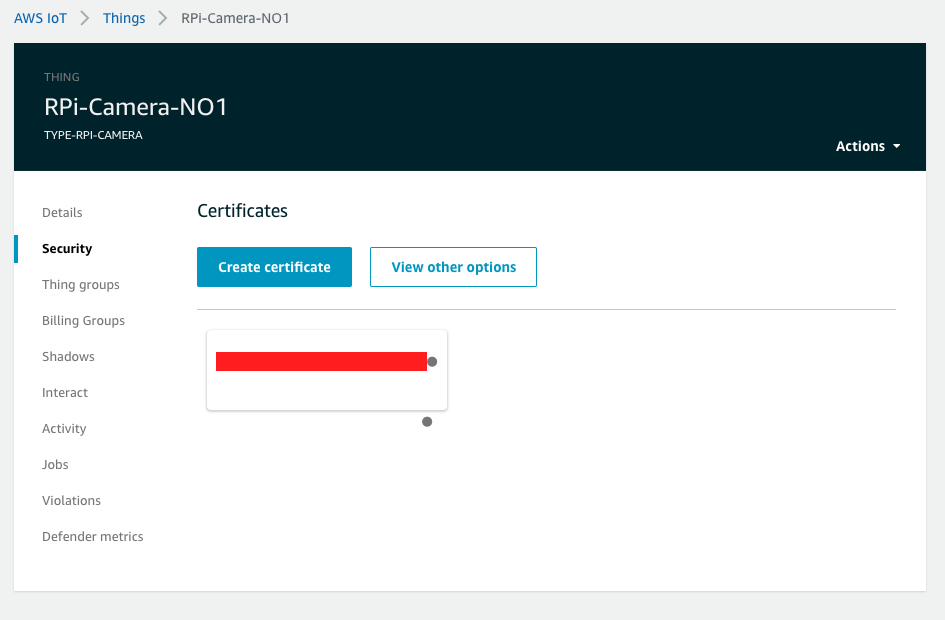
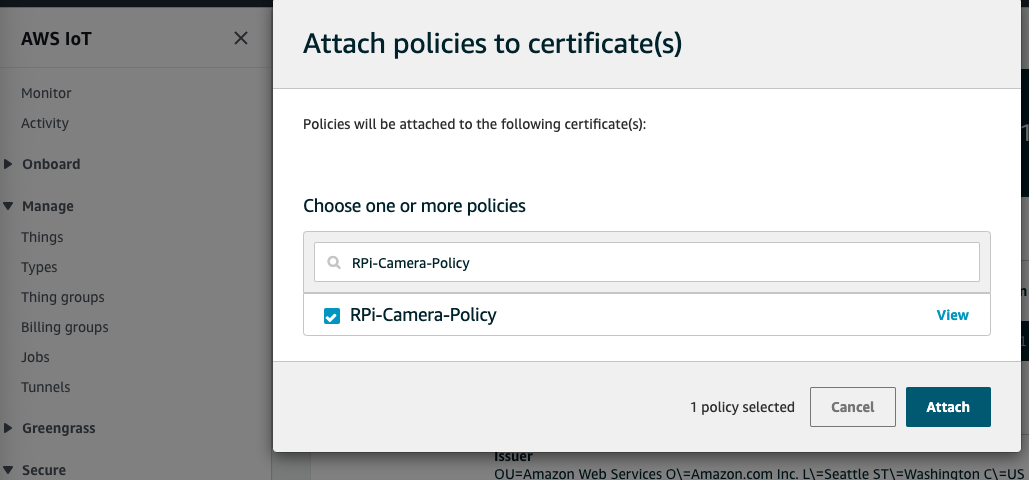
- Click Policies and drop down the Actions on top-left side then click Attach policy.
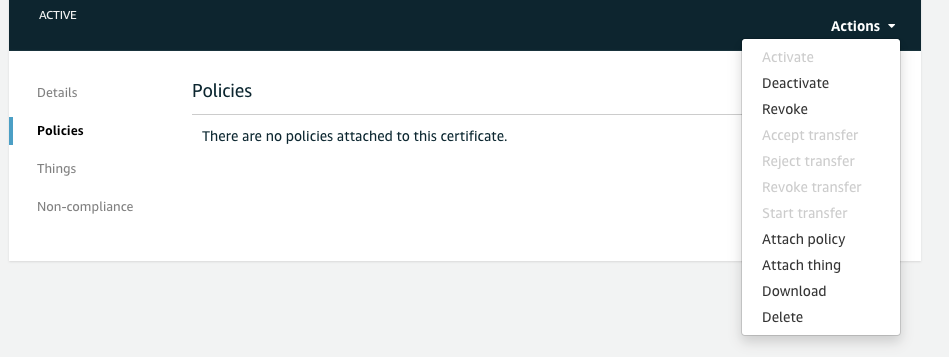
- Search the policy you created above then click Attach.
Modify your code and rebuild
To adopt AWS IoT Credential to connect Amazon KVS WebRTC service, you should modify the related codes.
- Copy the thing credential files to your Raspberry Pi 4.
scp ~/Downloads/xxxxxxx-certificate.pem.crt pi@your_RPi_IP:~/Downloads/ scp ~/Downloads/xxxxxxx-private.pem.key pi@your_RPi_IP:~/Downloads/ scp ~/Downloads/xxxxxxx-public.pem.key pi@your_RPi_IP:~/Downloads/ - Login to Raspberry Pi 4 and following the instructions to modify code.
cd ~/amazon-kinesis-video-streams-webrtc-sdk-c/ #Use your familiar editor to modify code vim.tiny samples/Common.c - Search the function
createStaticCredentialProviderand comment the whole lines out.CHK_STATUS(lookForSslCert(&pSampleConfiguration)); // Set the logger log level if (NULL == (pLogLevel = getenv(DEBUG_LOG_LEVEL_ENV_VAR)) || (STATUS_SUCCESS != STRTOUI32(pLogLevel, NULL, 10, &logLevel))) { logLevel = LOG_LEVEL_WARN; } SET_LOGGER_LOG_LEVEL(logLevel); //CHK_STATUS( // createStaticCredentialProvider(pAccessKey, 0, pSecretKey, 0, pSessionToken, 0, MAX_UINT64, &pSampleConfiguration->pCredentialProvider)); - Add the following lines after step 2.
SET_LOGGER_LOG_LEVEL(logLevel); //CHK_STATUS( // createStaticCredentialProvider(pAccessKey, 0, pSecretKey, 0, pSessionToken, 0, MAX_UINT64, &pSampleConfiguration->pCredentialProvider)); //Tec add for IoT CHK_STATUS( createLwsIotCredentialProvider( "cxxxxxxx.credentials.iot.ap-northeast-1.amazonaws.com", // IoT credentials endpoint "/home/pi/Downloads/xxxxxxx-certificate.pem.crt", // path to iot certificate "/home/pi/Downloads/xxxxxxx-private.pem.key", // path to iot private key "/home/pi/amazon-kinesis-video-streams-webrtc-sdk-c/certs/cert.pem", // path to CA cert "your_policy_alias", // IoT role alias channelName, // iot thing name, recommended to be same as your channel name &pSampleConfiguration->pCredentialProvider)); - Search the function “freeStaticCredentialProvider” and comment the whole line out. Add a line as below.
if (IS_VALID_CVAR_VALUE(pSampleConfiguration->cvar)) { CVAR_FREE(pSampleConfiguration->cvar); } //freeStaticCredentialProvider(&pSampleConfiguration->pCredentialProvider); //Tec add for releasing freeIotCredentialProvider(&pSampleConfiguration->pCredentialProvider); - Recompile and run it. Check the video stream using the same test web page above.
cd build
make -j4
#....
#....
#You can export your AK/SK to whatever value to verify.
./kvsWebrtcClientMaster your_thing_name
Next